

I have had four very conveniently-sized plastic storage crates in my posession for about 25 years, but I was never able to find them again since the year I bought them, so never had enough (I need about 8 to store all my stuff). And now the plastic is starting to degrade and one has already developed a split in the lid, and another has lost a latch somewhere along its travels, so I guess it is time to make some new ones.
Since I went to all the trouble of inventing my own convenient units of measurement, I am going to make the crates match those. My origional plastic crates are quite close in size to that anyway, by pure coincidence. Actualy, that is too harsh: They were very close to that size because my octal-Plank-length unit is very human-scale-friendly in the first place, so other things designed for human-use tend to gravitate to that scale as a matter of practicality!
I am using 17mm form-ply as I have enough suitably-sized off-cuts of this lying about to make at least two trunks. They are designed to be stackable, with Teflon™ (PTFE) feet arranged somewhat like (up-side-down) Lego™ blocks (or even more like Modulo™, since they are based on 1:1:1 proportioned cubes), though only for stacking-alignment: they won't actually lock together tightly like Lego™/Modulo™ bricks!
As mentioned, I am normalising my dimensions on my personal (base-8) measurement system, accounting for 17mm plywood thickness, 1mm Laminex™/Vinyl cover thickness, 0.5mm inside over-dimension for fit-tolerance, and 2.6mm (1/128th) outside air-gap, all together providing a (virtual) wall thickness of 1/16th. This means I get a 7/8th unit internal dimension per cubic volume and an external stacking offset of exactly 1 unit in every direction. Nice and neat. As the crates are going to be double-length, I added a 1/16th extra length to the 14/8ths internal length, to accept an optional divider, and that gives me a 13mm air-gap at each end, which works well with the handles I have as those need around 10mm of clearance when (mostly) folded into their recess. It all seems to work out nicely!

I have made cases like this before, though not normalised to my personal dimensions. I used to do nice 45° cuts on all the joints, but this time, as I intend to cover it all with Laminex™ or Vinyl, visible butt-ends don't matter. In fact, the directions of the 90° joins are specifically chosen to optimise the case strength against anticipated stresses (from when lifting with the handles, the contents weight on the bottom, and the stacking-weight on the lid) when held together with screws, by keeping the directions of force perpendicular to said screws as much as possible. They will also be glued, but that is more about waterproofing the joints and any extra strength from that is just a bonus.
I make things to last - sometimes to my own undoing, if I later change my mind and have to dis-assemble something I made earlier!
Recessed latches. I ordered 14 standard (in black) and 2 with barrel locks, as I don't realy need to lock many of my crates (most just contain spare kitchen utensils or clothes or old computer parts, but one contains personal files). I couldn't get lockable ones in black, unforunately.
|
|
Also, some nice recessed handles (spring-loaded pop-out):

I could have gone with matching-silver for the whole lot, except I already had the handles (salvaged from some damaged road-cases I got to break up some time back).

I have used standard fold-hinges, and also cupboard hinges before on crates. This time I am going to try out some concealed hinges, which will leave no parts extending awkwardly outside or inside the case, when closed.

The body and lid of the first trunk is assembled from the cut-up scrap form-ply. Lots of screws for strength and, as mentioned, also glue, predominantly as gap-sealant.

Here are the 'concealed' hinges. Quite nice. The plastic plate sitting in the lid of the trunk is the marking template for the hinges I laser-cut/engraved so that I could get the alignment perfect.
I have decided to cover the outside of this trunk with some black leather-look vinyl. Possibly with metal corners and/or edges to cover seams. Then come handles and latches. And finally the eight nylon feet.

I printed a template (as three A3 sheets cut and glued together) to guide placement of the nylon feet. I was origionally going to have these 3D-printed in nylon, but found 38mm nylon feet ready-made online, which was close enough to 42mm for my purposes here.

And the eight feet are on.

And a pair of laser-cut sheets with divots for the feet on the trunk are glued on top.
...
To come: The metal bit to stop the lid over-opening, and covering the top with leather-look black vinyl.
Wooden trunks, while very strong, are hard to build, and expensive to have custom-made! That is fine for storing items I value, but I also have a bunch of stuff that don't really require that level of storage-security.
After unboxing a new classroom whiteboard at work, I had a couple of huge pieces of flat corrugated cardboard, so decided to make some cardboard trunks to match the wooden ones. These are designed to be strong enough for the storage of relatively-light goods, and be stacked on top of the stronger trunks.
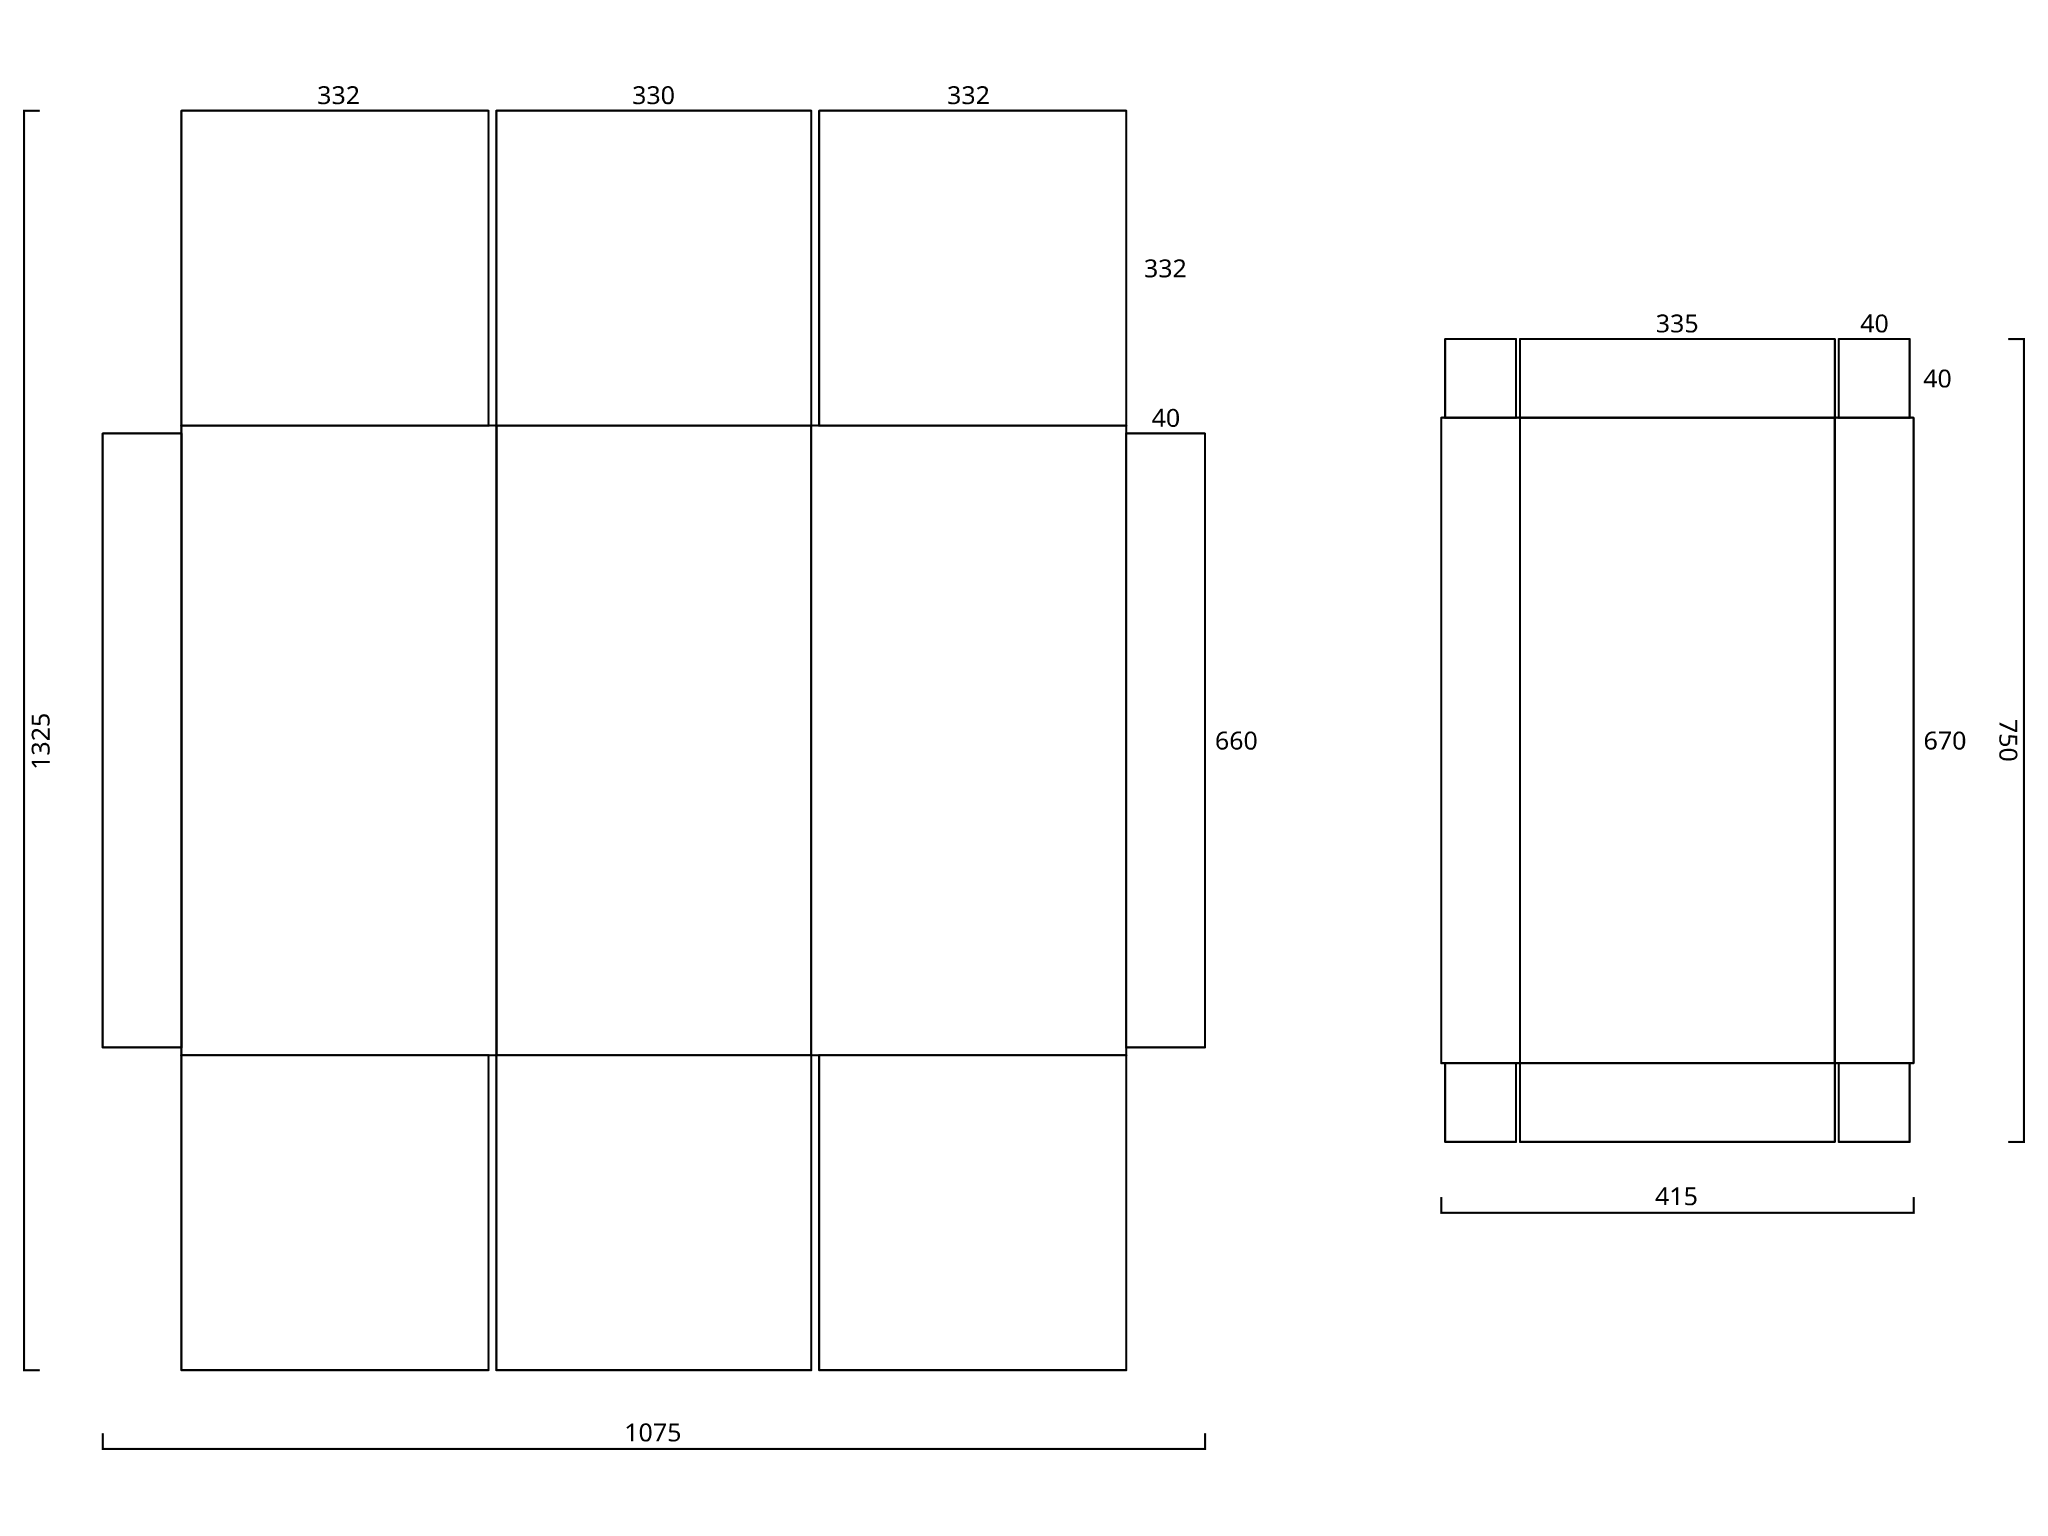
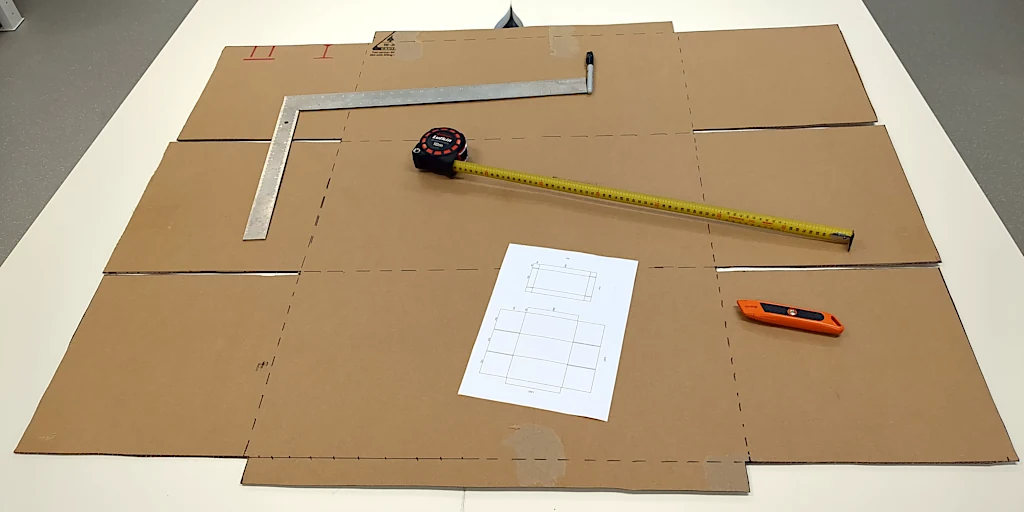
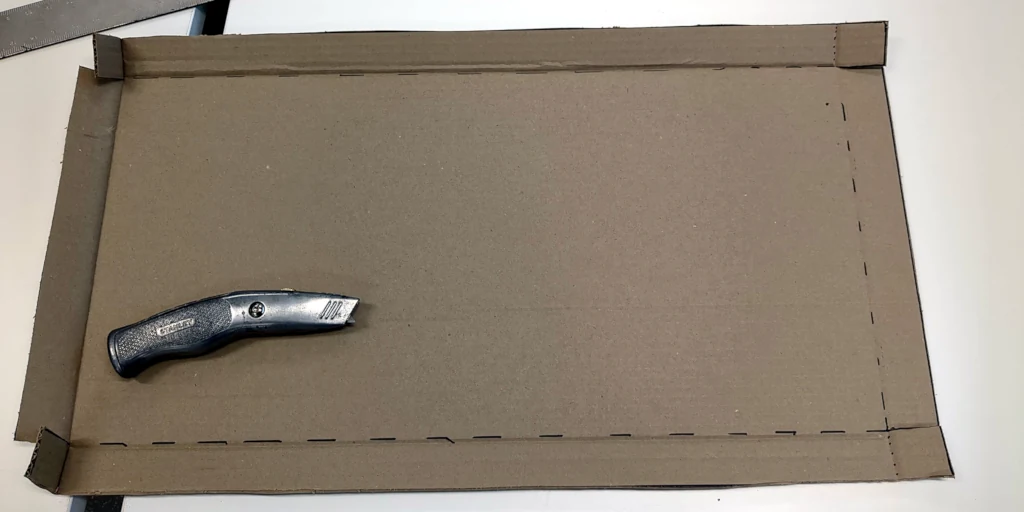
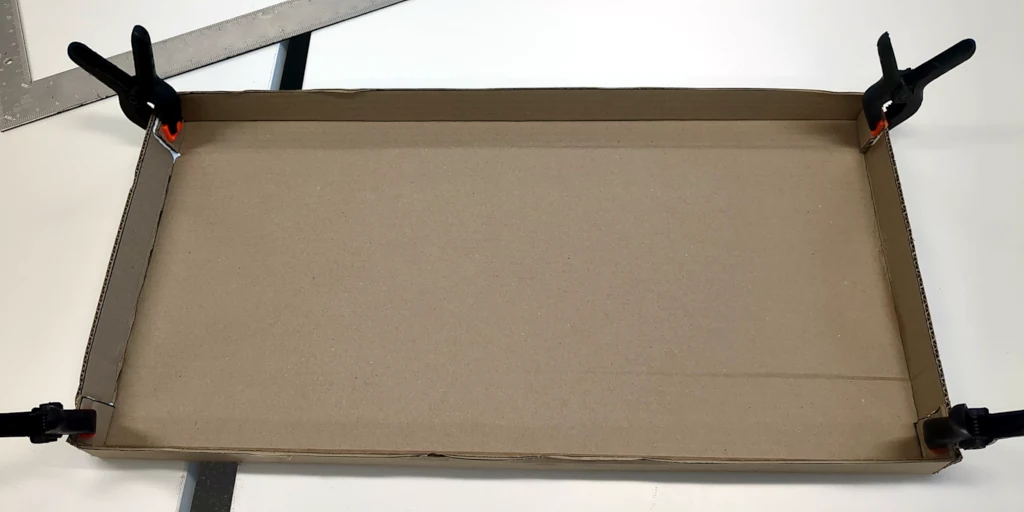
I cut out the shape desired. In this case there are 3 pieces on each 'end' which fold+glue together to make it nice and thick and strong. Also some flaps on the top to fold over for a little extra strength there.

I found that when folding and glueing, each side had to be left lightly clamped, with a flat surface holding it down, so that it doesn't bow annoyingly while the glue dries. This meant doing one side each day with 24-hours drying time. I use PVA glue, which for light porous surfaces is far stronger than people generally give it credit for.

And for the handle holes, I drilled 42mm holes space 84mm apart. Just using a hole-saw, not pushing too hard, and doing half the drilling from each side was sufficiently neat. Then did the strait cuts between them with a stanley knife.
I also had some smaller pieces of double-corrugated card, so cut this to glue to the inside base, to also make that extra-strong.
The lids required much less material, and I had a spare smaller sheet of cardboard I could use for this.
I am less concerned with the strength of the lid, which is mainly just a dust-cover, so made it a bit more simply.
...
To come: A quick spray-paint, and a picture of the lid on the box.
 Glenn's home page.