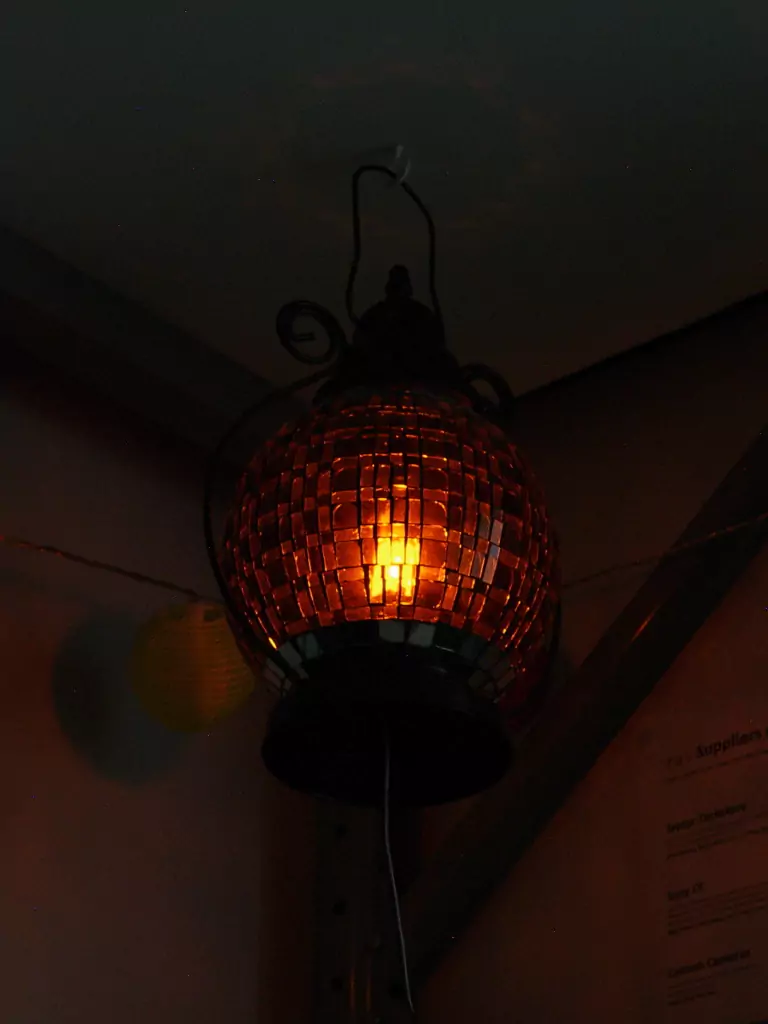
A friend had a candle lantern that she didn't need but it was too good to throw out, so I electrified it.
This is also the solution to the fact that you can't generally use fire in studios or live performances.
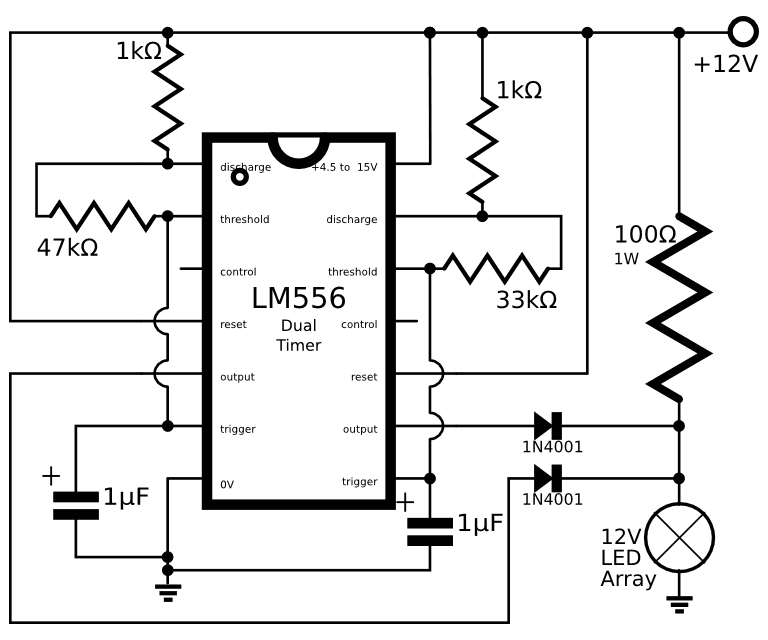
I adapted a simple 555 LED flash circuit from here using a 556 chip, which is 2x 555 circuits on one chip and altering resistor values to get a faster oscillation rate.
Lets divide the circuit into its 3 functional parts:

Above, the two resistors and capacitor determine the speed at which the oscillator operates. The sample circuit I adapted from had values to provide about a 1 second oscillation rate. I changed the 470kOhm resistor for a 47kOhm (1/10th the resistance) which makes the oscillator cycle at about ten times the speed, so about 10 on/off cycles per second (the relationship between resistor/capacitor values is actually more complicated than that, but for this circuit it doesn't really matter much).
As per the source circuit example, we don't want to use the reset pin, so we 'tie' it 'high' (connect it to the positive voltage rail) so it is never triggered (if we left it unconnected, it would drift up and down unpredictably). The control pin is also not needed -- this pin can be left floating (not connected) without causing problems for the circuit inside the chip. The 4.5-15V pin is connected to the positive supply voltage and the 0V pin is connected to the negative ('ground', in this circuit).
The second part of the circuit is almost identical to the first. The only difference is the 47kOhm resistor is now 33kOhm. This is because we want the second oscillator running at not-quite-the-same speed, so they will run variably out-of-step.
Finally, we have a 100-Ohm 1Watt resistor directly from the positive rail to the LED array. This is because we want the light to flicker between dim and bright, not flash between off and bright, so we supply it with limited power at all times. (I actually used a 5W resistor simply because that is what I had, but 1W would have been plenty - I measured the LED array pulling about half a watt in a direct battery connection).
The two diodes coming from the outputs of the oscillators stop the opposing oscillators sucking down each-other's 'on' signal if their counterpart is 'off'. Because diodes only allow power to travel across them in one direction, any reverse current back into an oscillator's output when it is in the 'off' part of its cycle is blocked. Note: two diodes like this is a simple 'or' circuit from a logical perspective: the output is 'on' when input 1 OR input 2 are on.
Because the timer circuits in the 556 cycle at somewhat different rates, the combined on/off time is variable in both timing and duration (favoring 'on'), allowing the LED array to flicker irregularly, which looks very flame-like.
Also note that there is no current limiting resistor on the LED array. This is because the array I used was designed to operate directly off a 12V supply (automotive) so the current limiting it needs is built in to the array block (that is also why I used the general symbol for a 'light source' rather than the more specific 'LED' symbol in the above diagram -- the array is a 'black box' and I don't know, or care, what is going on inside it: just its power needs).
The next step was to implement the circuit on a breadboard:

And having verified it worked as desired, I moved the components to prototyping board:

I mounted the circuit on the top of an old spray-can cap (which was already mat-black - we use a lot of mat-black paint around the studio and gallery, as you might expect). This fitted quite nicely in the base of the lamp where the fat candle used to sit, raising the LED array up to the right height. I also made a diffuser for the LED array out of some scrap semi-translucent plastic.
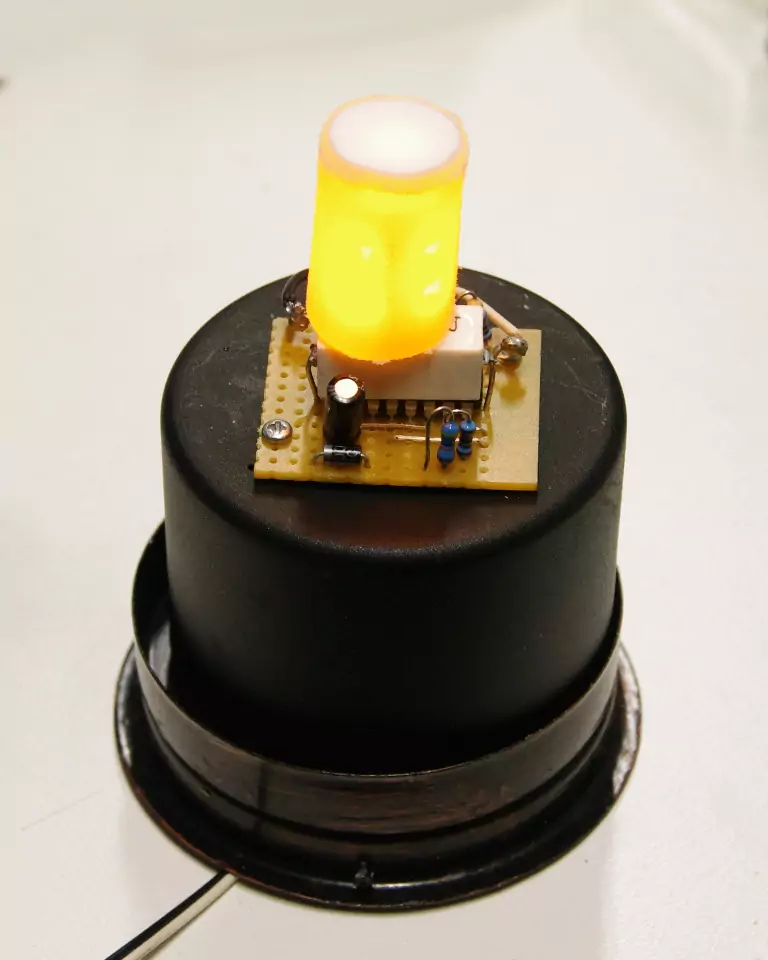
It flickers very convincingly - a number of students were surprised when I opened the lantern to show them it wasn't a real candle!
Things to do in the future:
 Glenn's home page.